- Kalorien
- 180
- Eiweiß
- 6g
- Ballaststoffe
- 5g
- Ges. Fett
- 1g
- Natrium
- 220mg
- Zugesetzter Zucker
- 0g
Was dieses Rezept für Sie leistet.
A hummus so smooth and airy it makes the supermarket tub taste like wallpaper paste: canned chickpeas simmered soft with a pinch of baking soda so their skins slip off, a tahini-and-lemon base whipped pale and fluffy before the chickpeas ever go in, and enough good tahini, lemon, garlic, and salt that it tastes alive rather than beige. It is naturally vegan, gluten-free, and anti-inflammatory, it comes together in one blender in twenty minutes, and it turns on the counterintuitive order in which you blend it.
Warum das funktioniert
Jedes Rezept auf dieser Seite kommt mit einer Erklärung der Technik-Entscheidungen: warum erst anbraten, dann schmoren, warum die Säure zum Schluss kommt, warum das Fett vor den Aromaten ausgelassen wird. Die Methode unten besteht aus genau diesen Entscheidungen, der Reihe nach.
Cuisinart 8-Cup Food Processor
Ultra-smooth hummus is made, not chosen, and the machine is what decides whether you get silk or grit. A full-size food processor with a sharp blade can run for the several unbroken minutes it takes to whip tahini and lemon into a pale mousse and then grind soft chickpeas into something genuinely creamy, without straining or overheating the way a small chopper or immersion blender does, and its wide bowl lets the mixture climb the sides and fall back on the blade so it processes evenly rather than leaving a gritty layer at the bottom. It scrapes down cleanly between the two blending stages this recipe leans on, it has the capacity for a proper batch you can portion through the week, and it is the same workhorse that makes falafel, pesto, and nut butters. A high-speed blender gets there too if you have the tamper to keep a thick mix moving; the one tool that will fight you is a stick blender in a tall jug.
Zutaten
8 Portionen- 2 canschickpeas · 15 oz each, drained
- 1/2 tspbaking soda
- 2/3 cuptahini · well stirred
- 1lemon · juiced
- 2garlic cloves
- 1/2 tspground cumin
- 1/3 cupice water · added gradually
- 2 tbspextra-virgin olive oil · to serve
- 1/2 tsppaprika or sumac · to serve
- kosher salt · to taste
Methode
Start from canned chickpeas, but do not stop there
You do not need to soak and cook dried chickpeas overnight to beat the tub, but you cannot just blend chickpeas straight from the can either, which is where most homemade hummus goes wrong and comes out grainy and bland. Canned chickpeas are the sensible base, but they are firm and their skins are intact, and both of those are the enemies of smoothness. The good news is a few extra minutes of cooking transforms them: what makes restaurant hummus silky is chickpeas cooked well past the point of holding their shape, until they are almost falling apart, so treat the tin as a starting point rather than the finished ingredient.
Simmer the chickpeas soft with a pinch of baking soda
Tip the drained chickpeas into a pan, cover them with water, add a good half-teaspoon of baking soda, and simmer them for around fifteen to twenty minutes until they are very soft and their skins are floating loose. The baking soda raises the pH, which breaks down the tough pectin in the skins and the chickpea flesh so they collapse easily and blend to a cream, and it loosens the papery skins so they lift off almost on their own. Skim off the skins and froth that rise to the surface as it simmers. This single step is the biggest difference between a gritty homemade hummus and the airy, smooth kind, and it costs nothing but a few minutes.
Get rid of the skins for true silk
The papery skin on each chickpea is the main source of grittiness, so the smoother you want your hummus the more seriously you take removing them. Simmering with baking soda does most of the work by loosening them, and many float off while you skim; drain the chickpeas and most of the rest rinse away or rub off easily in a bowl of water with your hands, rising to the top to be poured off. You do not have to peel every single one by hand for a good result, but the more you remove the closer you get to that restaurant-smooth texture. If you are short on time, the baking-soda simmer alone gets you most of the way.
Whip the tahini and lemon first, before the chickpeas
This is the counterintuitive move that changes everything, and skipping it is why so much homemade hummus is dense and flat. Before the chickpeas go anywhere near the machine, blend the tahini with plenty of fresh lemon juice and the garlic on their own. The acid seizes the tahini into a thick, stiff paste and then, as you drizzle in ice-cold water a little at a time with the motor running, it loosens and lightens into a pale, glossy, whipped cream. Building this airy emulsion first gives the whole hummus its fluffy body and creamy mouthfeel; add everything at once instead and you get a heavy purée. Get the base pale and mousse-like before moving on.
Use good, loose, fresh tahini, because it is the backbone
Hummus is really a tahini dip carried by chickpeas, so the tahini is the flavour, and a cheap, bitter, or stale one will sink the whole thing no matter what else you do. Use a good-quality tahini that pours loosely and smells nutty and toasty rather than acrid; the best are usually made from hulled Ethiopian or Levantine sesame and stir back together smoothly. Give the jar a thorough stir before measuring, since the oil separates and the solids at the bottom are where bitterness hides. Do not be shy with the quantity, either: a proper hummus is generously tahini-rich, which is what gives it richness and body without any dairy.
Season it to taste with lemon, garlic, salt, and cumin
A flat hummus is almost always an under-seasoned one, so build the flavour boldly and taste as you go. You want enough fresh lemon that it reads bright and a little sharp, enough salt that the chickpea and sesame flavours come forward, and a clove or two of garlic, though blending the raw garlic with the lemon first tames its harshness so it does not turn acrid and overpowering. A little ground cumin adds warmth and that characteristic savoury depth, and a pinch is traditional. Season, blend, then taste on a piece of bread or vegetable rather than off the spoon, since the seasoning reads differently once it is being scooped, and adjust the lemon and salt until it tastes alive.
Blend long with ice water until pale and airy
Smoothness is a function of time, not just power, so once the softened, skinned chickpeas go in with the whipped tahini base, let the machine run for a full few minutes rather than a few seconds. As it blends, drizzle in ice-cold water a spoonful at a time until the hummus lightens in colour and turns fluffy, soft, and pale; the cold water helps it whip up airy rather than dense and stops the machine heating and dulling the flavour. Stop to scrape down the sides so nothing escapes the blade. It will look too loose in the machine but firms up as it rests and chills, so err on the side of softer and airier than you think you want.
Rest it, then finish with oil and something on top
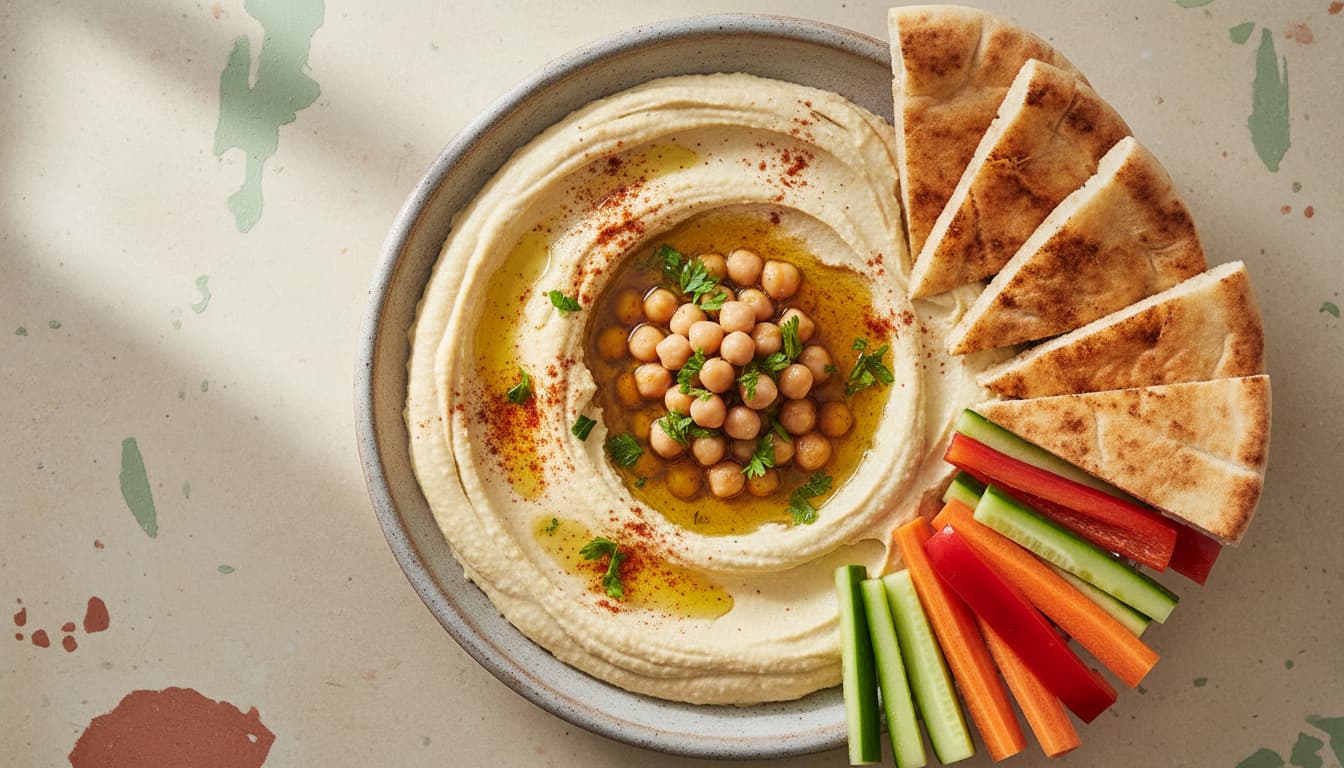
Hummus tastes noticeably better after twenty or thirty minutes resting, which lets the garlic mellow and the flavours settle, and it firms slightly to the right scooping texture. To serve it the proper way, spread it in a shallow bowl and use the back of a spoon to make a swirl or well, then flood that well with good extra-virgin olive oil and a dusting of paprika or sumac. From there, top it however you like: a scatter of whole warm chickpeas, chopped parsley, toasted pine nuts, or a spoon of harissa all work. Warm pita, crisp vegetables, or falafel alongside turn it from a dip into a meal, and that pool of olive oil is not optional, it is where a lot of the flavour lives.
Variationen
Substitutionen und Anpassungen folgen mit der Foto-Produktion. Die Methode hält bei den meisten sinnvollen Austauschen.
Aufbewahrung
Kühlschrank: 3 bis 4 Tage, verschlossen. Gefrierfach: bis zu 3 Monate. Abgedeckt aufwärmen, um die Feuchtigkeit zu halten.
Häufige Fragen
- How do I make hummus smooth and creamy?
- Two things do almost all of it, and neither is a more powerful blender. First, cook the chickpeas soft: simmer canned chickpeas with a pinch of baking soda for fifteen to twenty minutes until they are almost falling apart and their skins float loose, then skim or rub off as many skins as you can, since the skins are the main source of grittiness. Second, whip the tahini and lemon into a pale, fluffy base on their own before the chickpeas go in, drizzling in ice-cold water to lighten it, then blend the lot for a full few minutes rather than a few seconds. Soft skinless chickpeas plus an airy tahini emulsion plus time in the machine gives you restaurant-smooth hummus.
- Do I have to peel the chickpeas?
- Not entirely, but the more skins you remove the smoother the hummus, because the papery skin is what makes it gritty. The easiest route is to simmer the chickpeas with a little baking soda, which loosens the skins so many float off as you skim and the rest rub away in a bowl of water, rising to the top to be poured off. Peeling every last one by hand gives the silkiest possible result, but it is tedious and unnecessary for a very good hummus; the baking-soda simmer alone gets you most of the way. If you skip both the simmer and the peeling and blend chickpeas straight from the can, expect a grainier, denser dip.
- Is hummus healthy?
- Yes, hummus is a genuinely nutritious food built from whole ingredients: chickpeas, tahini, olive oil, lemon, and garlic. The chickpeas bring plant protein and a good dose of fibre that supports steady energy and digestion, the tahini and olive oil supply mostly unsaturated fats, and there is no added sugar. It fits a Mediterranean, vegan, gluten-free, and anti-inflammatory way of eating, and paired with vegetables or wholegrain bread it makes a balanced snack or light meal. The main things to watch are portion size, since it is calorie-dense from the tahini and oil, and salt if you are buying it, though a homemade batch lets you control both.
- Can I make hummus without tahini?
- You can, but it will taste noticeably different, because tahini is the ingredient that gives hummus its rich, nutty, savoury backbone, so a tahini-free version is really a chickpea dip rather than classic hummus. If you cannot use it, the nearest substitutes are a smooth nut or seed butter such as cashew or sunflower, which mimic the creaminess, plus a little extra olive oil for richness. Lean harder on lemon, garlic, and cumin to keep it interesting, and blend it just as long and airy. It will still be good, but if you can get good tahini it is worth it, since nothing else quite delivers the same flavour.
- How long does homemade hummus last in the fridge?
- About four to five days in a sealed container in the fridge. It actually tastes best a few hours after making, once the garlic has mellowed and the flavours have settled, so it keeps well over the first couple of days. A film of olive oil poured over the surface helps seal it and keep it fresh, and a quick stir before serving brings back the creamy texture if it has firmed up. Give it a taste before serving leftovers and adjust the lemon and salt, since cold dulls seasoning. Hummus also freezes reasonably well for up to a few months; thaw it in the fridge and beat in a little olive oil or water to smooth it back out.
- Why is my hummus bitter?
- Usually the tahini or the garlic. Tahini turns bitter when it is stale, cheap, or made from unhulled or over-roasted sesame, and the bitterness concentrates in the thick solids at the bottom of the jar, so use a good fresh tahini and stir it thoroughly before measuring. Raw garlic is the other culprit, especially if you use a lot or blend it in whole; blending the garlic with the lemon juice first tames its harshness, and using less of it keeps it from turning acrid and overpowering. Too much baking soda in the cooking water can also leave a faintly soapy, metallic edge, so keep it to a pinch and rinse the chickpeas well before blending.
Ähnliche Rezepte
Alle ansehen →Gazpacho: reife Tomaten, altes Brot, vier Stunden kalt
Gazpacho ist eine Emulsion, keine kalte Tomatensuppe. Warum eingeweichtes Brot und langsam eingegossenes Olivenöl die Textur machen, wie viel Sherryessig hineingehört und warum kalt immer nachgewürzt werden muss.
270m4g EiweißTabouleh: ein Kräutersalat mit Bulgur, nicht umgekehrt
Echtes Tabouleh besteht zu drei Vierteln aus Petersilie. Warum der Bulgur nur eingeweicht und nicht gekocht wird, warum die Petersilie vollständig trocken sein muss und warum die Tomaten vor dem Mischen abtropfen müssen.
45m4g EiweißCarbonara: keine Sahne, Guanciale, Pfanne runter vom Herd
Rührei statt Sauce entsteht bei zu viel Hitze. Warum Guanciale und nicht Speck, warum Pecorino und nicht Parmesan, wie viel Nudelwasser in die Eier gehört und bei welcher Temperatur die Emulsion bindet statt zu stocken.
30m27g Eiweiß
Erhalten Sie jeden Sonntag ein getestetes Rezept und eine Nährwert-Notiz in Ihr Postfach.
Ein Rezept pro Woche, fotografiert am selben Dienstag, an dem es getestet wurde. Von einer Ernährungsberaterin geprüft. Keine Werbung, keine Pop-ups, kein Tracking.
Das Clean-Chef-Starter-Kit.
Ein 14-Tage-Plan für entzündungshemmende Ernährung als PDF, Einkaufsliste nach Abteilungen, Makros pro Tag aufsummiert, Sonntags-Vorbereitung. Kostenlos.
Mit der Anmeldung stimmen Sie unserer Datenschutzerklärung zu. Eine ruhige E-Mail pro Woche. Jederzeit abbestellbar.
Wir bauen einen Shop.
Kuratiertes Kochgeschirr, Vorratsbasics, die wir wirklich kaufen, Rezept-Bundle-PDFs. Erfahren Sie als Erste, wann er öffnet.
Wir schreiben Ihnen nur zur Shop-Eröffnung. In jeder E-Mail abbestellbar. Siehe unsere Datenschutzerklärung.