- Calories
- 240
- Protein
- 6g
- Fiber
- 5g
- Sat. fat
- 2g
- Sodium
- 60mg
- Added sugar
- 6g
What this recipe does for you.
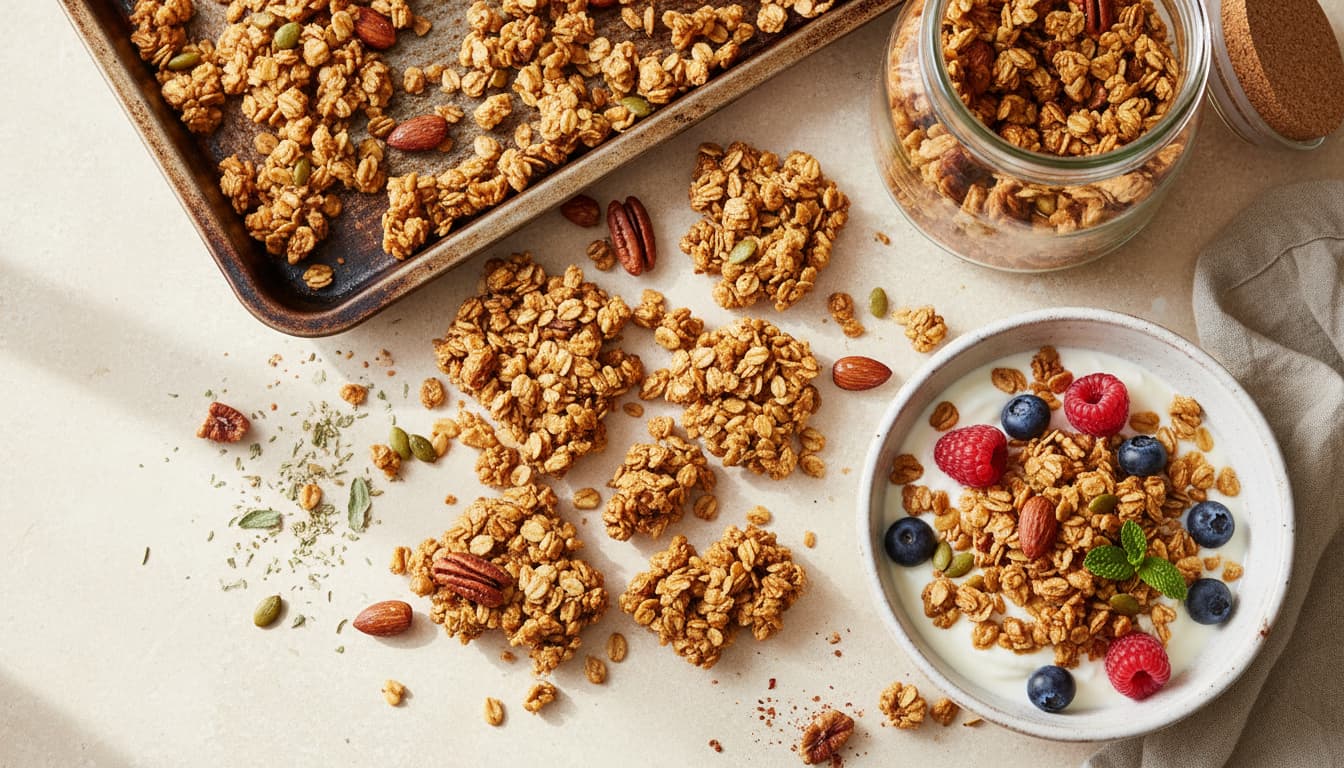
A granola that bakes into proper crunchy clusters instead of loose dusty oats: the right wet-to-dry ratio, pressed flat and left undisturbed, baked low and slow, then cooled completely on the tray before you break it up. Naturally sweetened with maple, vegan, and endlessly adaptable. The two moves that make big clusters, and why stirring is the enemy of crunch.
Why this works
Every recipe on this site ships with an explanation of the technique decisions, why sear then braise, why the acid goes in at the end, why the fat renders before the aromatics. The method below is those decisions, in order.
Old-fashioned rolled oats
Granola is mostly oats, so the oat decides everything. Old-fashioned rolled oats are broad and flat, which means they lock together into big crunchy clusters and toast evenly across the tray. Quick oats are cut too small and bake to a fine, dusty gravel that never clusters, and steel-cut oats stay hard and raw in the time it takes the rest to brown. Any large-flake rolled oat works, and certified gluten-free ones make the whole batch gluten-free. This is the one ingredient not to compromise on.
Ingredients
Serves 10- 3 cupsold-fashioned rolled oats
- 1 cupmixed nuts · roughly chopped
- 1/2 cuppumpkin and sunflower seeds
- 1/3 cupneutral oil
- 1/3 cupmaple syrup
- 1 tspvanilla extract
- 1 tspground cinnamon
- 1/2 tspsea salt
- 1/2 cupdried fruit · added after baking
Method
Start with large rolled oats, not quick or steel-cut
Tip old-fashioned rolled oats into your biggest bowl along with any nuts and seeds you want, chopped roughly so they toast at the same rate. Big flat flakes are what let granola clump into clusters and toast evenly; quick oats bake to dust and steel-cut stay stubbornly raw. Adding the nuts and seeds now means they get coated and toasted along with the oats rather than scattered raw on top. This dry base is the backbone of the whole tray.
Get the wet-to-dry ratio right
Whisk together a neutral or light oil and maple syrup in roughly equal parts, enough to coat every oat with a light sheen when you toss it through. Too little and the granola bakes dry and pale and never clusters; too much and it turns greasy and takes forever to crisp. The oil carries the heat and browning, the maple sweetens and helps the clusters set as it caramelises. Pour it over and toss thoroughly so there are no dry patches left in the bowl.
Season it, granola is not just sweet
Add a good pinch of salt, a spoon of vanilla, and warm spice like cinnamon before it goes on the tray. Salt is the difference between granola that tastes flat and one that tastes moreish, exactly as it is in any baking. A little vanilla and cinnamon give it depth so it does not read as one-note sweet. Fold these through the wet oats evenly. This seasoning step is quietly what makes a homemade batch taste better than most boxes.
Press it flat into a single layer
Spread the mix onto a lined tray and press it down firmly into an even, compact layer with the back of a spatula. This pressing is the first half of the cluster secret: pieces that are pushed together while wet bake into big sheets you can snap into chunks, while a loose, mounded scatter just bakes into individual toasted oats. Keep it to a single layer so it toasts evenly. A gentle, firm press all over sets you up for proper clusters.
Bake low and slow
Bake at 150C, low and slow, for around thirty minutes rather than blasting it hot. Granola burns easily because of the syrup, and a hot oven browns the outside while the inside is still soft and damp. A gentle heat dries it out evenly to a deep, even gold all the way through, which is where the crunch comes from. Set a timer and check it from twenty-five minutes; it should smell toasty and look golden, not dark.
Stir once at most, or not at all
If you want fine, free-flowing granola, stir it once halfway; if you want big clusters, do not stir it at all. This is the second half of the cluster secret. Every time you turn the tray you break apart the sheets that are trying to form, which is exactly why shop granola marketed on its clusters is so gently handled. For chunks, rotate the tray for even colour but leave the granola itself alone until it comes out.
Cool completely on the tray before touching it
Take the tray out while the granola still looks and feels a little soft, and leave it to cool completely without touching it. This is the step everyone rushes and it is the most important: granola crisps as it cools, not in the oven, as the caramelised syrup sets hard around the oats. Break into it warm and you get chewy, disappointing clumps and you smash the clusters. Wait the full twenty minutes and it firms into proper, snappable crunch.
Add dried fruit after baking and store airtight
Once the granola is completely cool, break it into clusters and only then stir through any dried fruit, then store it in an airtight jar. Dried fruit baked in the oven turns to hard, burnt little rocks, so it always goes in at the end. Kept sealed and dry, the granola stays crunchy for two to three weeks, longer than it usually lasts. If it ever softens, a few minutes back in a low oven and a full cool crisps it up again.
Variations
Substitutions and adaptations land with the photography shoot. The method holds across most reasonable swaps.
Storage
Refrigerator: 3 to 4 days, sealed. Freezer: up to 3 months. Reheat covered to retain moisture.
Frequently asked
- Why is my granola not crunchy?
- Almost always because it was broken up while still warm, or baked too fast. Granola is soft when it comes out of the oven and only crisps as it cools, when the syrup sets hard around the oats, so you have to leave it completely untouched on the tray until cold. Baking too hot browns the outside before the inside dries, leaving it chewy, so go low and slow. Too much oil or syrup also stops it crisping, so keep the wet ingredients measured.
- How do I get big granola clusters?
- Two things do it: press the mix firmly into a compact single layer before baking, and then leave it completely alone. Pressing packs the wet oats together so they bake into sheets, and not stirring lets those sheets set unbroken. Every stir breaks the clusters apart into loose oats. A little extra binder in the form of maple syrup helps them hold too. Bake low, do not touch it, cool it fully on the tray, then snap it into chunks with your hands.
- Is this granola actually healthy?
- It is far better than most boxed versions, which are often loaded with refined sugar and oil. This one is sweetened only with maple syrup, keeps the oil to what is needed for crunch, and is built on whole oats, nuts, and seeds, so it brings real fibre and some protein. It is still an energy-dense food, so portion is a scatter over yogurt rather than a full bowl. Making it yourself means you control exactly how sweet and how oily it is.
- How do I keep the granola vegan and gluten-free?
- It is naturally vegan as written, sweetened with maple syrup rather than honey, so just check any add-ins like chocolate are dairy-free. For gluten-free, use certified gluten-free rolled oats, since standard oats are frequently cross-contaminated with wheat during processing, and check that any mix-ins are gluten-free too. Everything else, the oil, maple, nuts, seeds, salt, and spice, is naturally free of both. That makes this an easy recipe to keep suitable for most people at the table.
- How long does homemade granola keep?
- Stored in an airtight jar somewhere cool and dry, it stays crunchy for two to three weeks, though it rarely lasts that long. The enemies are air and moisture, both of which soften it, so seal it well and never store it while even slightly warm, as trapped steam turns it chewy. If it does go soft, spread it back on a tray and give it a few minutes in a low oven, then cool it fully again and the crunch returns.
- What should I eat granola with?
- The classic is a scatter over yogurt with fresh fruit, where the crunch plays against the creamy and the tart, and it adds fibre and texture to an otherwise soft breakfast. It is also good over a smoothie bowl, with cold milk or a plant milk like any cereal, or eaten by the handful as a snack. Because it is sweetened lightly, it works on both a spoon of Greek yogurt for protein and a bowl of chia pudding. A little goes a long way.
Related recipes
See all →- Meal Types
Fried Rice: Cold Rice, Hot Pan, and Soy Down the Side
Fried rice is a moisture-management problem wearing a stir-fry costume. Freshly cooked rice is saturated and its starch is still gelatinised, so it clumps and steams. Rice that has spent a night uncovered in the fridge has lost surface water and retrograded, and it separates into individual grains in a hot pan. Twenty-five minutes of cooking, and one decision made the day before.
25m22g Protein - Meal Types
Apple Crisp: Two Varieties, Cold Butter, Forty-Five Minutes
A watery apple crisp is not a topping problem. It is an apple problem and a time problem. One variety of apple gives you either mush or raw wedges, and thirty minutes is long enough to brown a topping but not long enough to cook fruit through and drive off its water. Two varieties, a spoon of cornstarch, coarse oat topping made with cold butter, and forty-five minutes at 375F. Seventy-five minutes total, and it wants twenty of them to rest.
75m3g Protein - Meal Types
Coleslaw: Salt the Cabbage, Squeeze It, Then Dress It
Coleslaw goes watery for one reason. Cabbage is ninety-two percent water, and if you dress it raw, the salt in the dressing pulls that water out over the next hour and dilutes everything you just made. Salt the shredded cabbage first, let it drain for thirty minutes, squeeze it, and then dress it. Fifty minutes including the wait, and the difference is a slaw that is still crunchy on day three.
50m3g Protein
Get a tested recipe + a nutritional note in your inbox each Sunday.
One recipe a week, photographed on the same Tuesday it tested. Reviewed by an RD. No promotions, no pop-ups, no tracking.
The Clean Chef Starter Kit.
A 14-day anti-inflammatory meal plan PDF, grocery list by section, macros totaled per day, Sunday prep sequence. Free.
By subscribing, you agree to our Privacy Policy. One calm email a week. Unsubscribe anytime.
We're building a shop.
Curated cookware, pantry staples we actually buy, recipe-bundle PDFs. Be the first to know when it opens.
We'll only email you about the shop opening. Unsubscribe in any email. See our Privacy Policy.